Synology [Community]
This is a community contribution and not officially supported by the Immich team, but included here for convenience.
Community support can be found in the dedicated channel on the Discord Server.
Immich can easily be installed on a Synology NAS using Container Manager within DSM. If you have not installed Container Manager already, you can install it in the Packages Center. Refer to the Container Manager docs for more information on using Container Manager.
Step 1 - Download the required files
Create a directory of your choice (e.g. ./immich-app) to house Immich. In general, it's best practice to have all Docker-based applications running under the ./docker directory, so in this case, your directory structure will look like ./docker/immich-app.
Now create a ./postgres and ./library directory as sub-directories of the ./docker/immich-app.
When you're all done, you should have the following:
./docker/immich-app/postgres./docker/immich-app/library
Download docker-compose.yml and example.env to your computer. Upload the files to the ./docker/immich-app directory, and rename example.env to .env. Note: If you plan to use the Synology Text editor to edit the .env file on the NAS within File Station, you will need to rename it to a temporary name (e.g. example.txt) in order to see 'Open with Text Editor' in the file context menu. Once saved, rename it back to .env.
Step 2 - Populate the .env file with custom values
Follow Step 2 in Docker Compose for instructions on customizing the .env file, and then return back to this guide to continue.
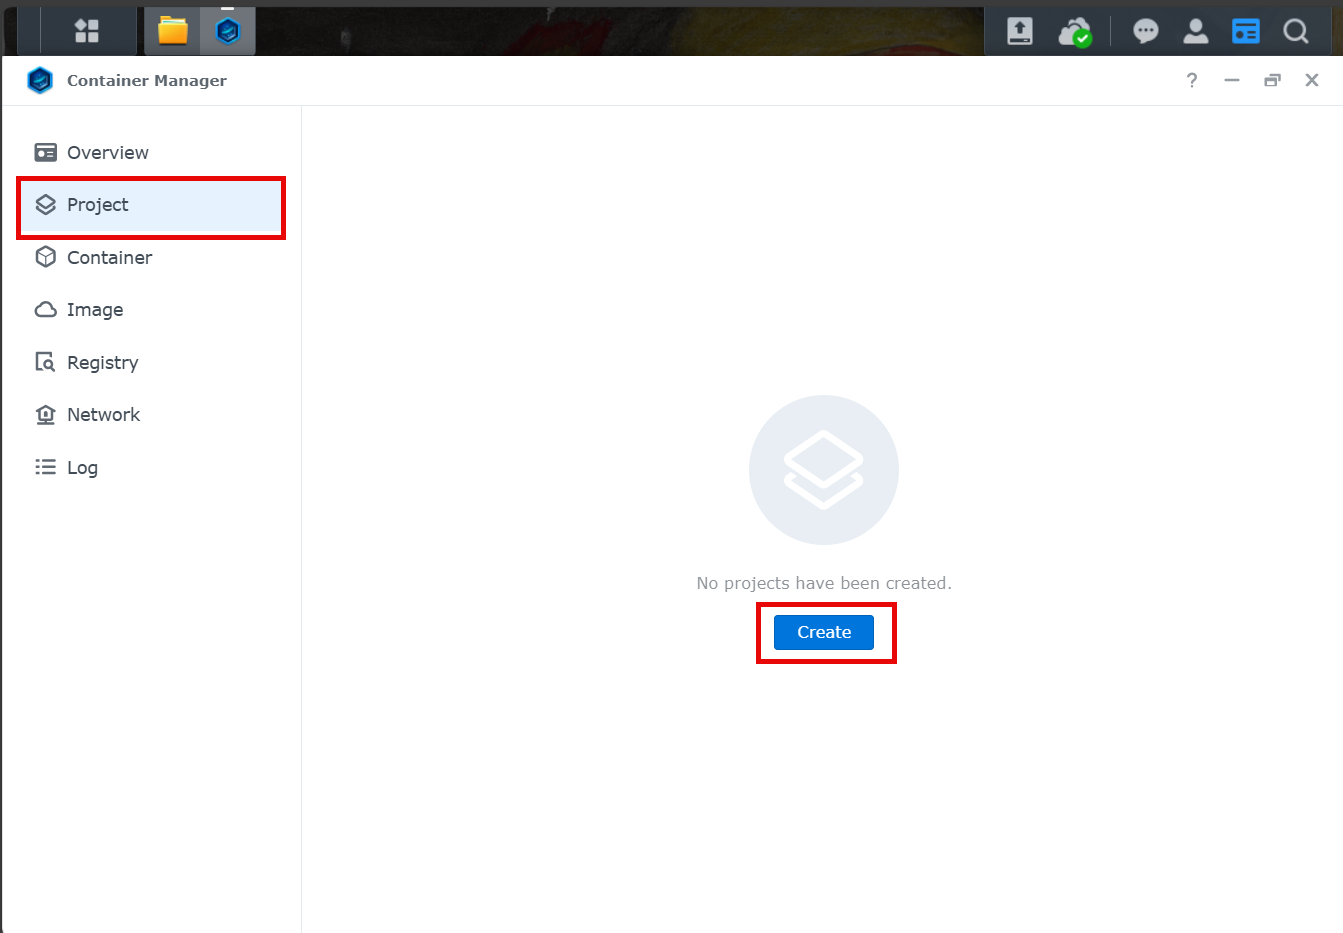
Step 3 - Create a new project in Container Manager
Open Container Manager, and select the "Project" action on the left navigation bar and then click "Create".
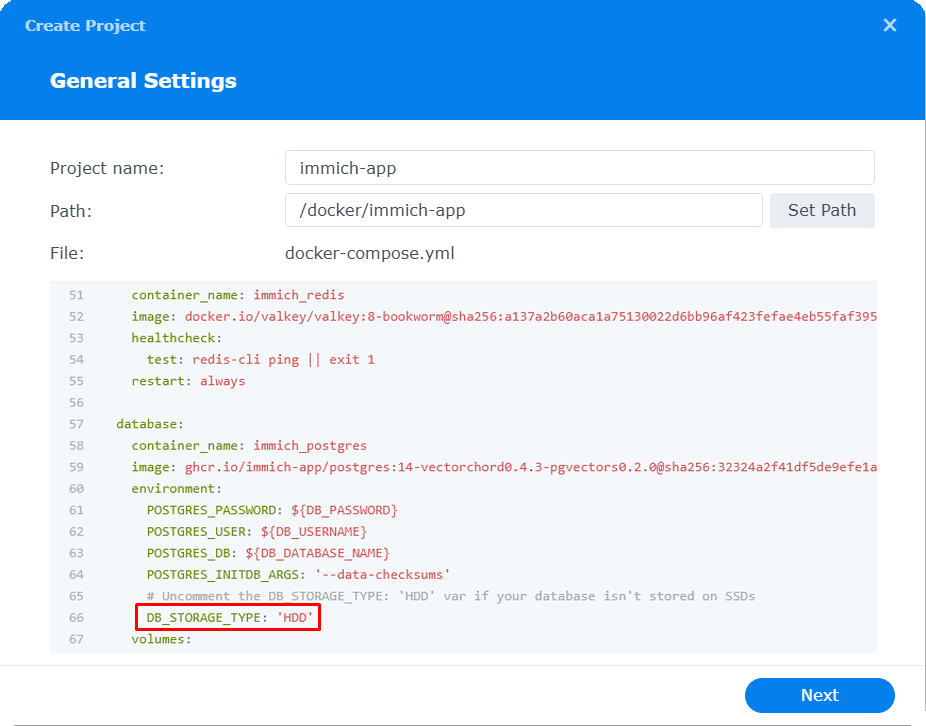
In the settings of your new project, set "Project name" to a name you'll remember, such as immich-app. When setting the "Path", select the ./docker/immich-app directory you created earlier. Doing so will prompt a message to use the existing docker-compose.yml already present in the directory for your project. Click "OK" to continue.

The following screen will give you the option to further customize your docker-compose.yml file. Take note of DB_STORAGE_TYPE: 'HDD' and uncomment if applicable for your Synology setup.
Skip the section asking to set-up a portal for Web Station, and then complete the wizard which will build and start the containers for your project.
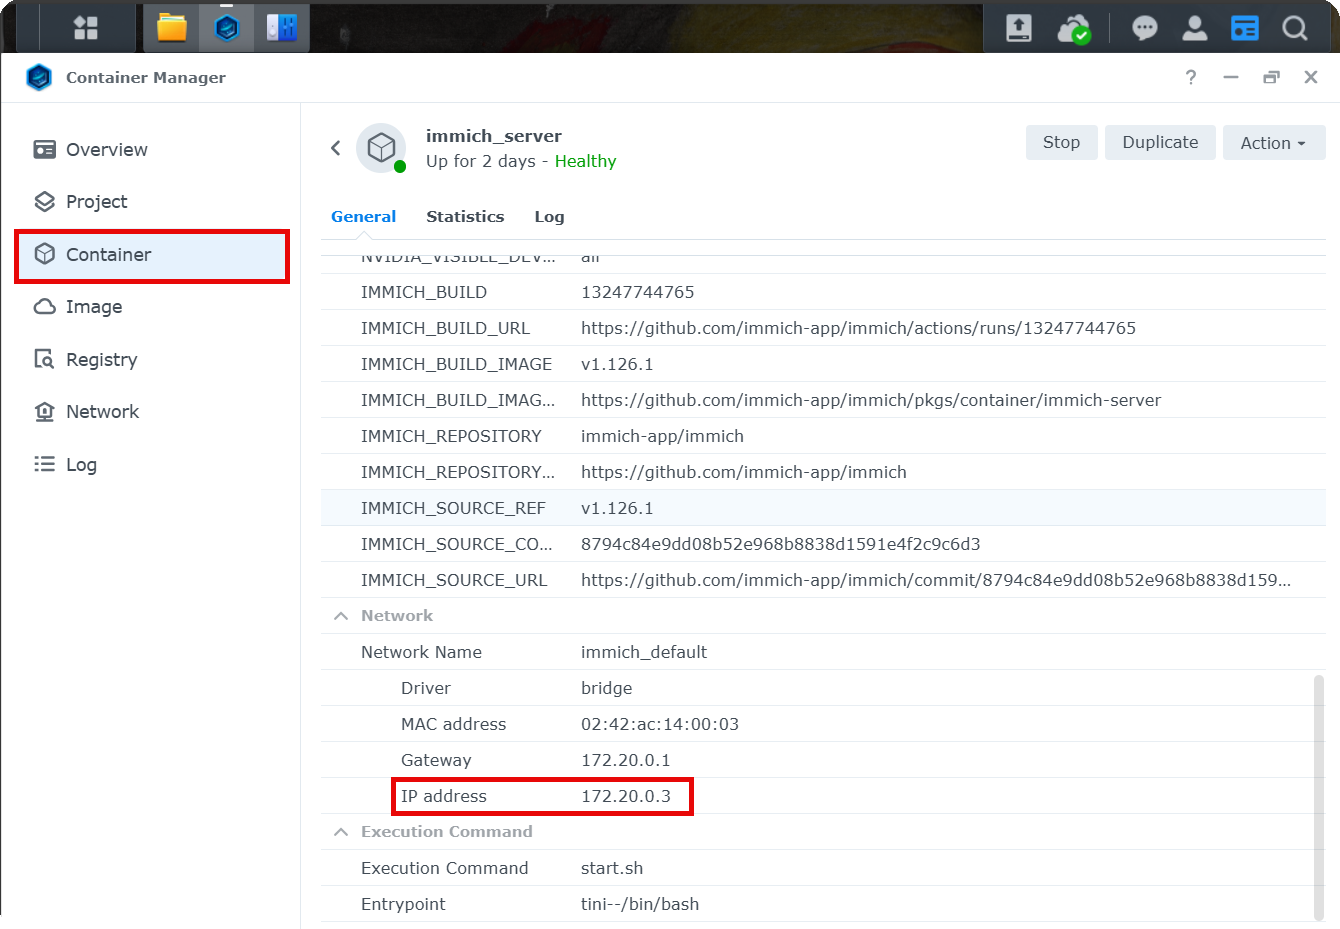
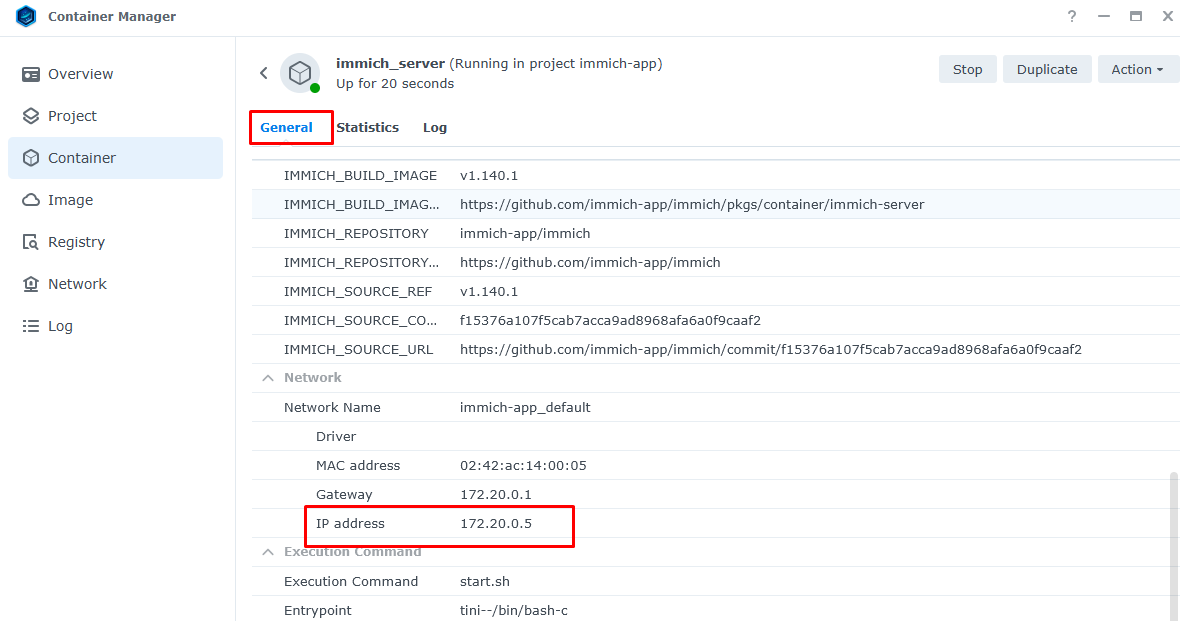
Once your containers are successfully running, navigate to the "Container" section of Container Manager, right-click on the "immich-server" container, and choose the "Details".
Scroll to the bottom of the "Details" section and find the IP Address listed in the Network section. Take note of the container's IP address as you will need it for Step 4.
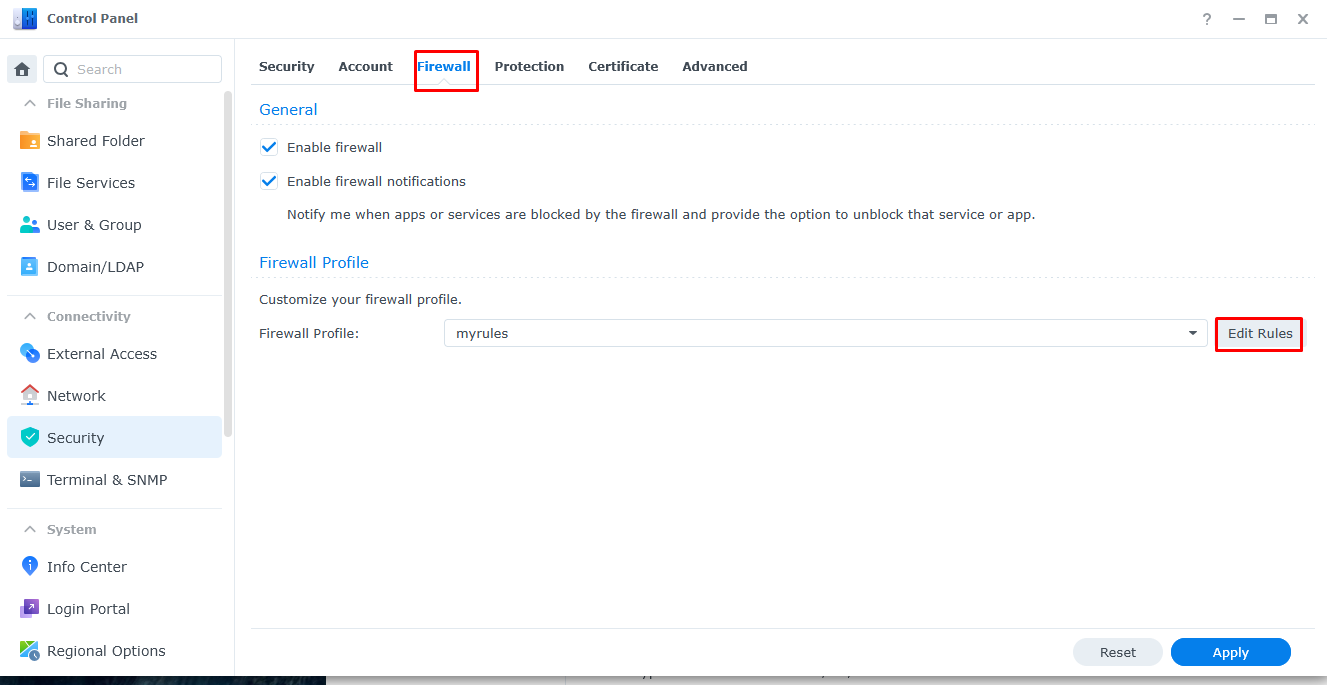
Step 4 - Configure Firewall Settings
Once your project completes the build process, your containers will start. In order to be able to access Immich from your browser, you need to configure the firewall settings for your Synology NAS to allow communication between the Immich containers.
Open "Control Panel" on your Synology NAS, and select "Security". Navigate to "Firewall"
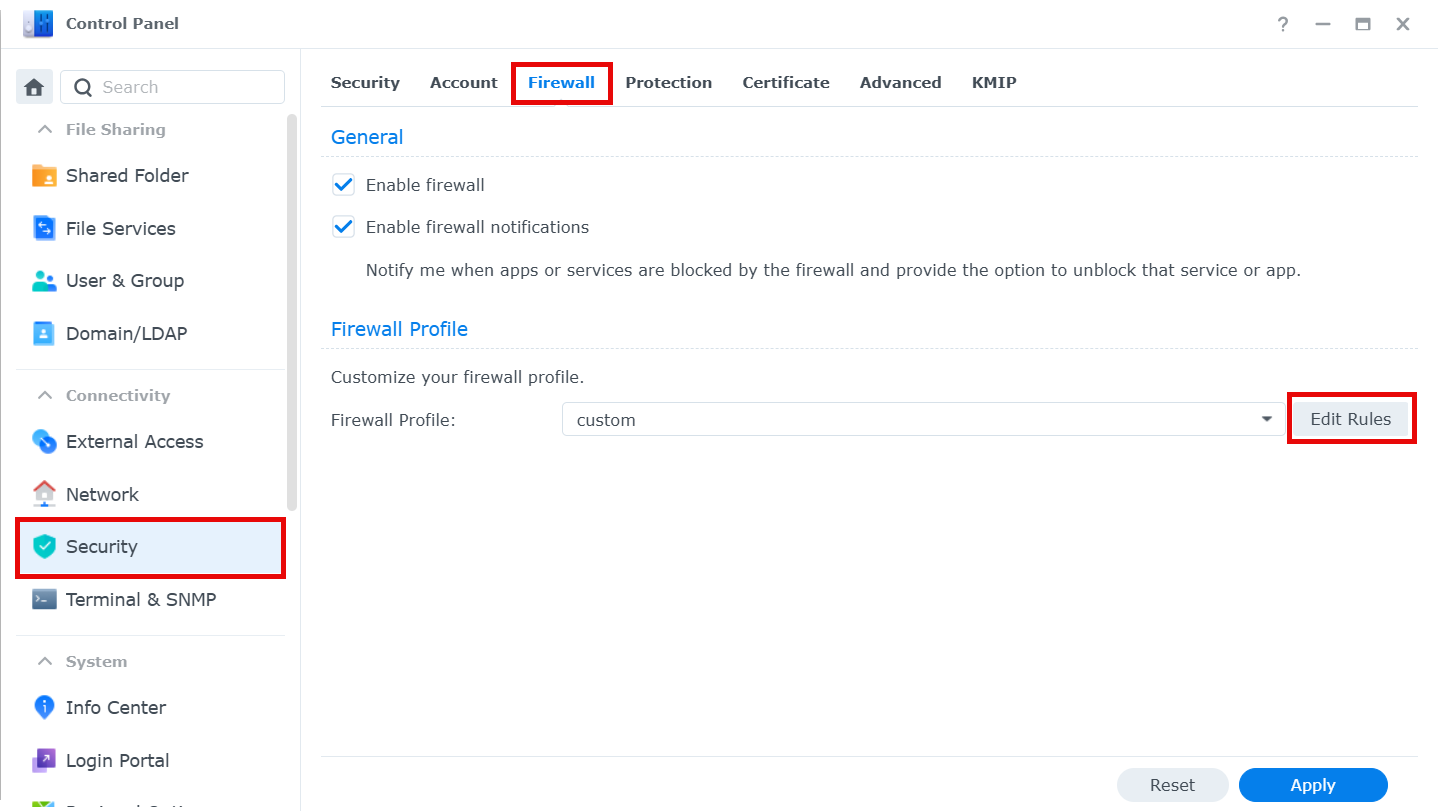
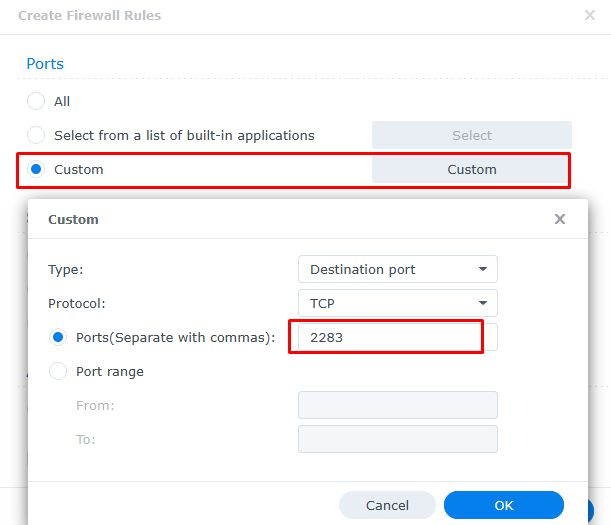
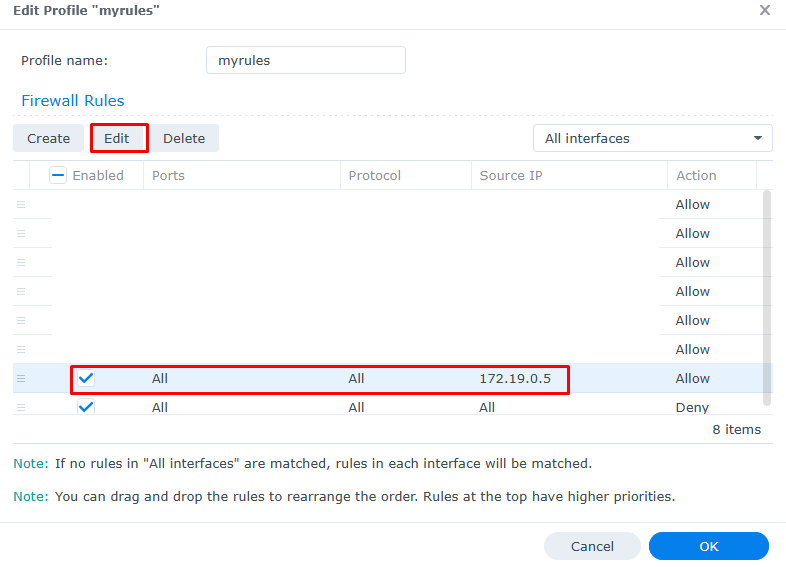
Click "Edit Rules" and add the following firewall rules:
- Add a "Source IP" rule for the IP address of your container that you obtained in Step 3 above
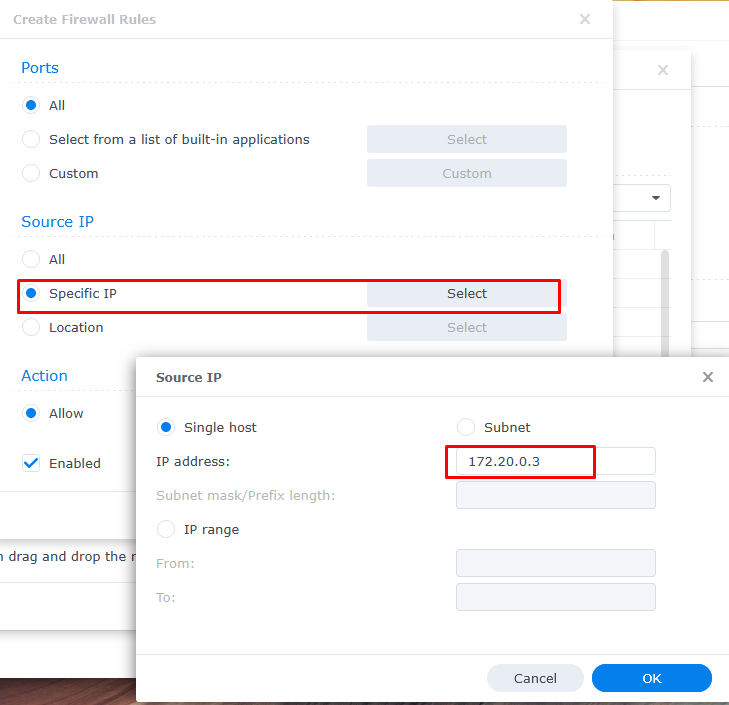
- Add a "Ports" rule for the port specified in the
docker-compose.yml, which should be2283
Next Steps
Read the Post Installation steps and upgrade instructions.
Updating Immich using Container Manager
Check the post installation and upgrade instructions at the links above before proceeding with this section.
Step 1. Backup
Ensure your photos and videos are backed up. Your .env settings will define where they are stored. There is no need to delete any files or folders within the docker folder when doing a release upgrade unless instructed in the release notes.
Step 2. Check release notes
Always check the release notes before proceeding with an update!
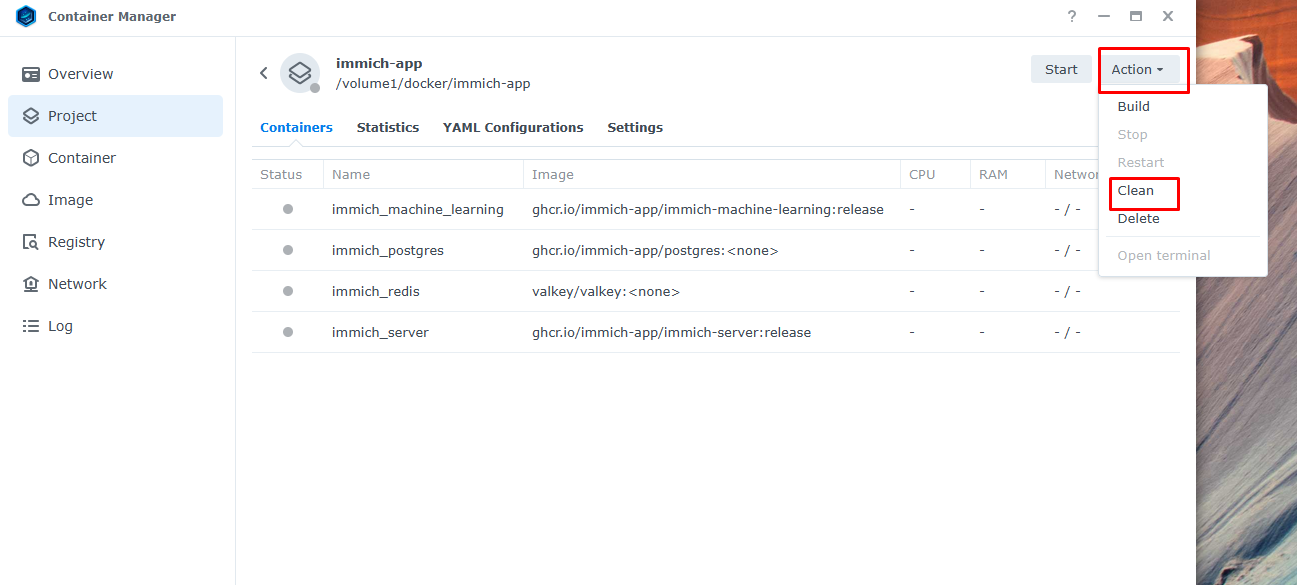
Step 3. Stop containers & clean up
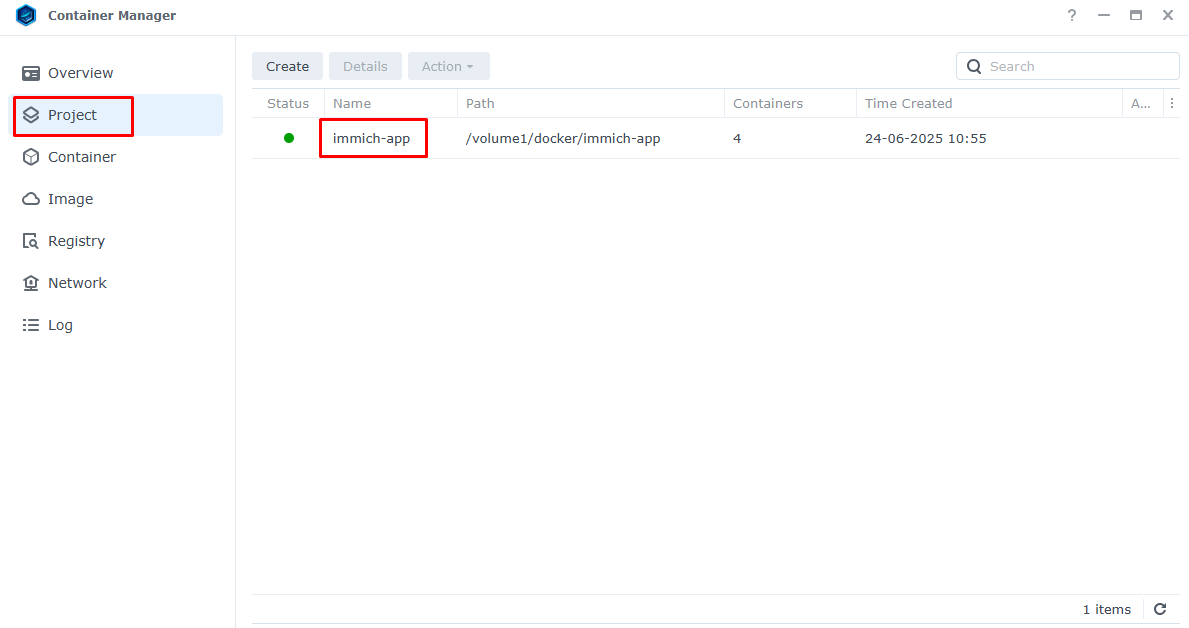
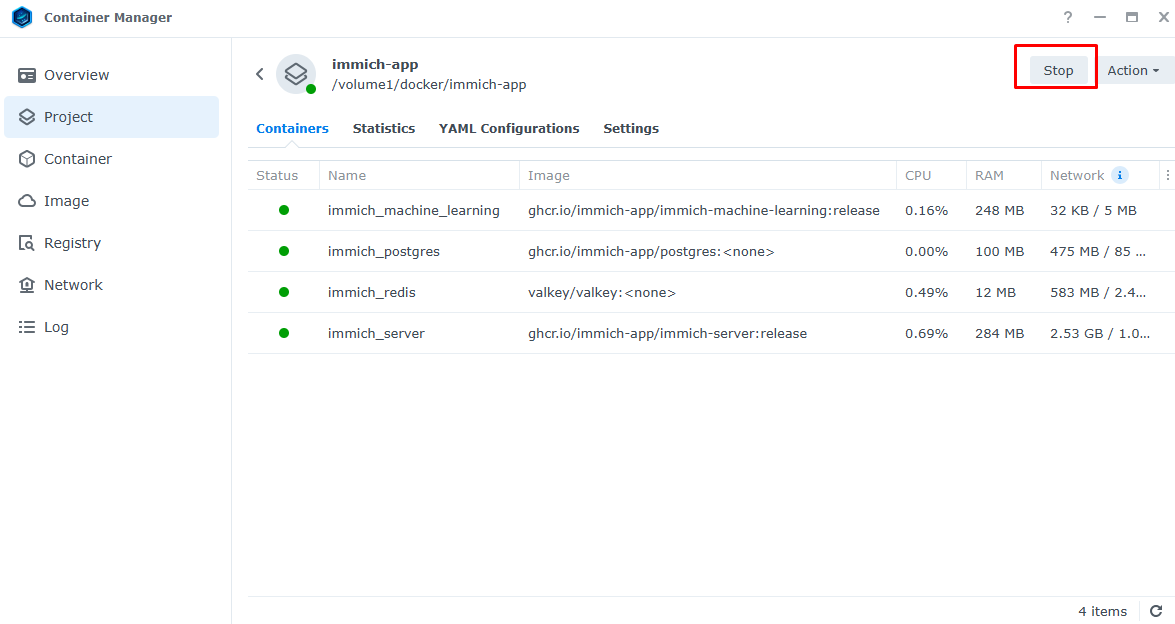
Open Container Manager. Select Project then your Immich app
Select Stop
Select Action then Clean. This removes the containers.
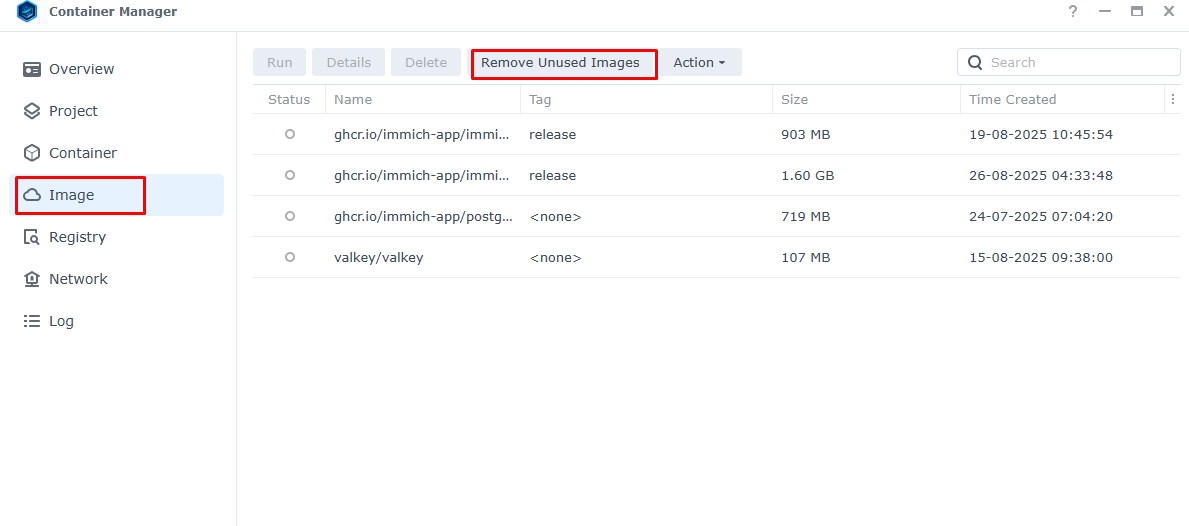
Go to Image and select Remove Unused Images.
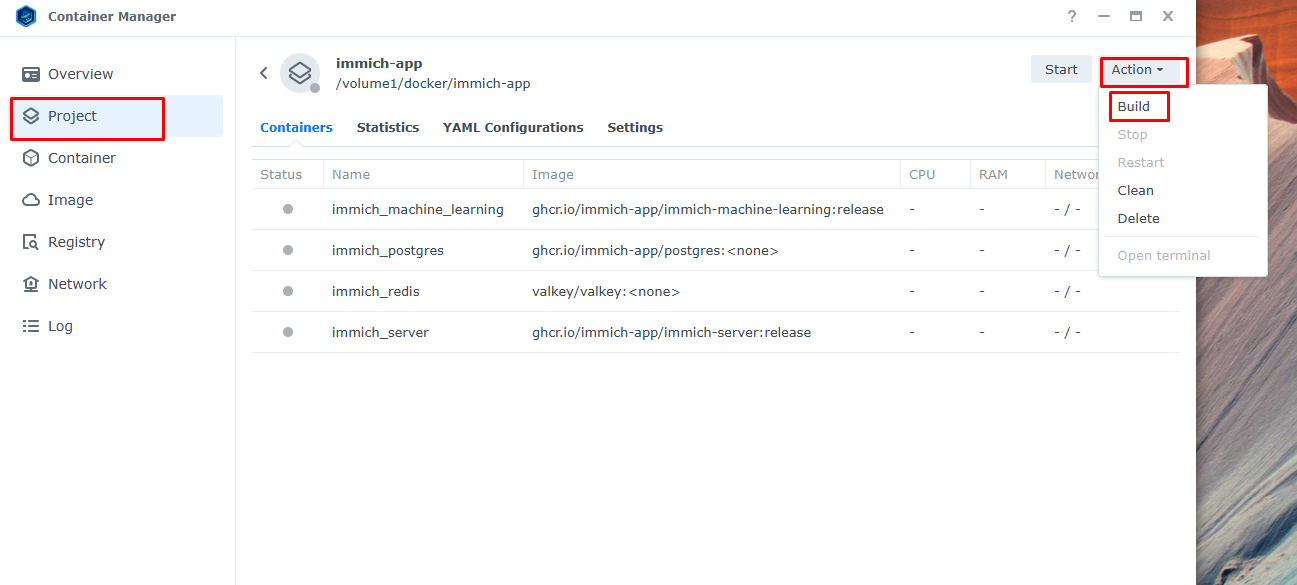
Step 4. Build
Go to Project, select Action then Build. This will download, unpack, install and start the containers.
Step 5. Update firewall rule
Without a fixed subnet, the default behavior is to automatically start the containers once installed. If immich_server runs for a few seconds and then stops, it may be because the firewall rule no longer matches the server IP address.
Go to the Container section. Click on immich_server and scroll down on General to find the IP address.
Go to Synology Control Panel. Select Security and Firewall.
In this example, the IP addresses mismatch and the firewall rule needs to be edited to match above.
To prevent future firewall issues, you may set a fixed subnet. See Set Fixed Subnet for instructions.
Set Fixed Subnet
Docker by default assigns dynamic subnets to bridge networks which can change when rebuilding containers and can cause firewall rules to break. To avoid this, define a fixed subnet in your docker-compose.yml:
Step 1. Determine current subnet
Go to the Container section. Click on immich_server and scroll down on General to find the IP address.
Step 2. Add network configuration
Add the following network configuration at the end of your docker-compose.yml file:
networks:
  immich-network:
    driver: bridge
    ipam:
      config:
        - subnet: 172.20.0.0/16
          gateway: 172.20.0.1
If your docker container is running on a different subnet then update accordingly.
Step 3. Add network to each service
Add the network to each service (immich-server, immich-machine-learning, redis, database):
services:
  immich-server:
    # other config options
    networks:
      - immich-network

  immich-machine-learning:
    # other config options
    networks:
      - immich-network

  redis:
    # other config options
    networks:
      - immich-network

  database:
    # other config options
    networks:
      - immich-network
Save your changes. Synology will ask if you want to save changes only or rebuild containers. Select rebuild containers.
Step 4. Update Firewall Rules, if necessary
If your firewall rules were not already set for this subnet, the firewall rules will need to be updated. See Step 4 - Configure Firewall Settings.